Windows is known to offer a satisfying user experience to all its users. However, sometimes specific issues may ruin it. One such issue is the Windows 10 Start Menu not working error. This issue prevents you from accessing and using the Start menu. So, it is essential to fix it.
In this post, I will explain what the Start menu not working issue is on Windows 10 along with the 5 best methods to resolve it. These methods are known to be the most effective against this error. Try them and get rid of the problem.

What is the Windows 10 Start Menu Not Working Error?
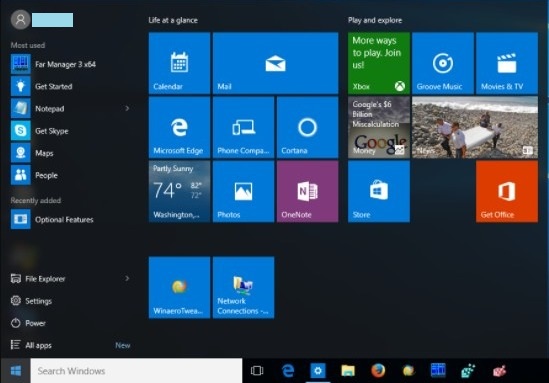
The “Start menu” is one of the key factors that have helped Windows 10 gain the popularity it has. It is a useful feature to access apps, system settings, recently used stuff on your Windows PC. When it was removed in Windows 8, Microsoft was heavily criticized. So, it decided to bring it back with Windows 10 and the users loved the decision.
However, users are now sad again due to an error known as the ‘Windows 10 Start menu not working.’ This error is caused by certain OS bugs that lead to the freezing of the Start menu. When it occurs, you will not be able to access or use the Start menu.
Sometimes the Start menu becomes slow and unresponsive, while the other times it may completely stop working. You will face a tough time then.
5 Methods to Fix the Windows 10 Start Menu Not Working Issue
Fortunately, solving this issue is pretty simple. However, different solutions are known to work for different users. Out of all the available solutions, we have collected the 5 most effective solutions for this problem. You can use these, one by one until the issue gets resolved on your PC.
Note: Some of these methods may lead you to lose your precious files, apps, and other data. So, make a complete backup of your system, or back up all your files on another system or drive before proceeding.
1. Repair Files with sfc/ scannow
Corrupt or incorrectly configured system files are the most common cause of this issue. So, you can just repair them to get rid of this error. Follow these steps to know what you have to do:
Step-1: Press and hold the Windows+X key together to trigger the Power user menu. Next, click on ‘Command Prompt (Admin).’

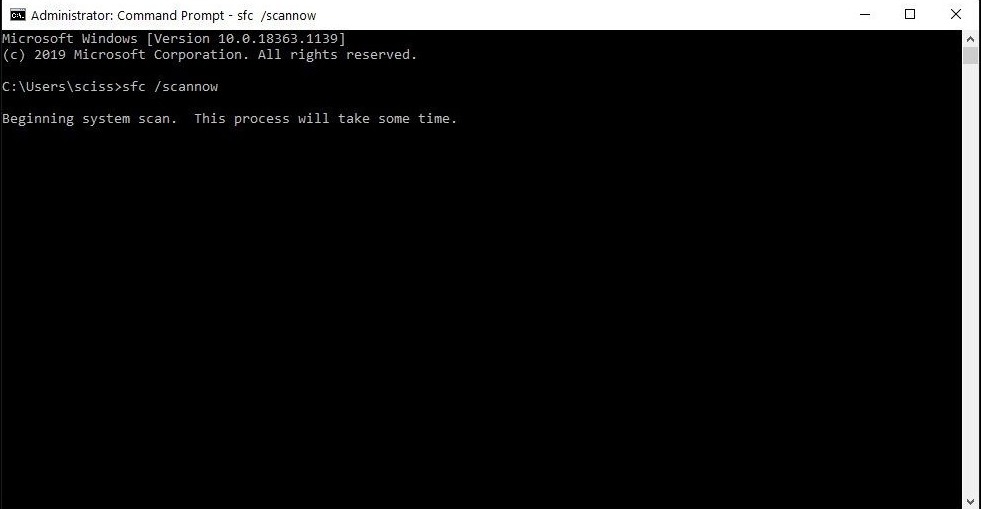
Step-2: In the Command Prompt window, type the sfc /scannow command (Note there is space after sfc), and hit the ‘Enter’ key on the keyboard.
Step-3: Wait for the system scan to complete. This may take some time. Make sure the PC doesn’t shut down during the procedure.
Step-4: If there are any issues with system files, it will prompt you to fix them. If there aren’t any issues, it will state that things are fine.
Step-5: Restart your computer.
That’s it. This is the simplest and very effective solution for this error.
2. Restart Windows Explorer
Another fairly simple and effective solution for this problem is restarting Windows Explorer via the Task Manager. This works usually when the WE is the real culprit behind the error. Follow these steps to know what you have to do:
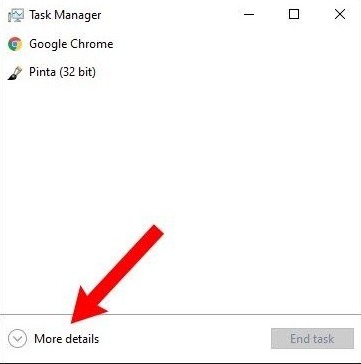
Step-1: Press and hold the CTRL+ALT+DELETE keys together, and then click on Task Manager to launch it. Once launched, click on ‘More details.’
Step-2: In the Task Manager, find Windows Explorer. Right-click on it, and then click on ‘Restart.’
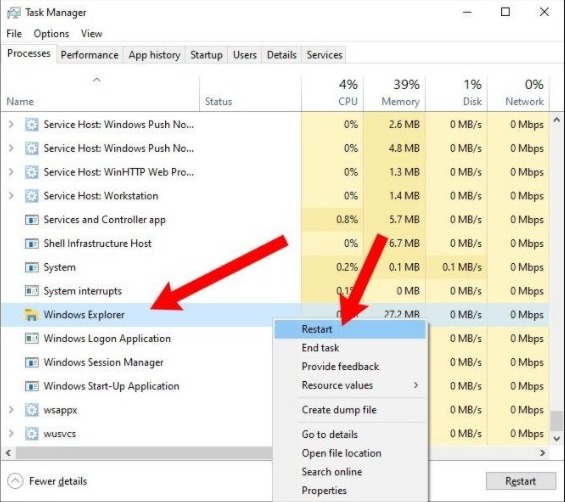
Step-3: Wait for it to restart, and then check if the Start menu has started working again.
That’s it. Remember that this is not a permanent solution. So, the next time the problem arises, you’ll have to do the same.
3. Run a Special PowerShell Command
You can also fix the Star Menu not working issue on Windows 10 with the help of PowerShell. All you have to do is run some simple commands. Follow these steps in order to learn how to do that:
Step-1: Go to the Start Menu, right-click on it, and select Windows PowerShell (Admin). You have to run it as an administrator.

Step-2: In the PowerShell window, copy and paste this command-
Get-AppXPackage -AllUsers | Foreach {Add-AppxPackage -DisableDevelopmentMode -Register “$($_.InstallLocation)AppXManifest.xml”}

Step-3: Press the Enter key on the keyboard, and wait for the command to execute properly.
That’s it. Once the command runs successfully, the Start menu will start working again. However, this is yet another temporary fix and not a permanent one. So, whenever the issue re-appears, you will have to re-do the procedure.
4. Install Windows Updates
If you haven’t installed any Windows updates, then you may end up seeing this error. Follow these steps to check and install any available Windows updates to resolve the issue:
Step-1: Press the Windows+I key together to access the Settings app.
Step-2: In the Settings window, click on ‘Update & Security.’

Step-3: Next, click on the ‘Check for updates’ button present on the right panel.
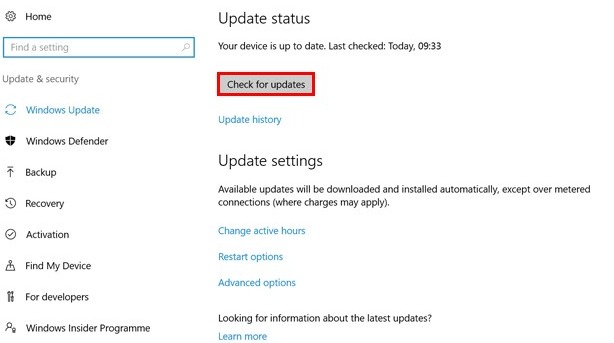
Step-4: If there are any Windows updates available, download and install them.
Step-5: Wait for the update procedure to complete.
That’s it. Updates are provided to fix existing OS bugs, glitches, and other problems while also enhancing the performance. Make sure you always install the latest updates to get an improved user experience.
5. Refresh Windows
If the Start menu not working issue is still troubling you, then you should consider ‘Refreshing’ Windows. Remember that this is different than formatting your Windows PC, and you can keep your files safe. Only additional apps and programs will be removed. Still, you should back up all your important data before proceeding.
Once ready, follow these steps:
Step-1: Restart your Windows PC, and click on the Power icon present at the bottom right section on the login screen.
Step-2: Hold down the ‘Shift’ key on the keyboard, and choose the ‘Restart’ option.

Step-3: Next, click on ‘Troubleshoot’ on the blue ‘Choose an option’ screen.
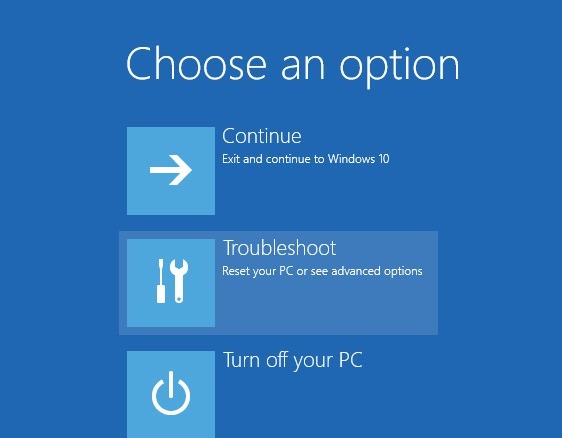
Step-4: Next, click on ‘Reset this PC.’

Step-5: Next, click on ‘Keep my files.’

Step-6: Keep following the on-screen instructions and wait for the procedure to complete.
Once it is done, your PC will be refreshed to the default settings, and the existing problems will be solved.
Final Words
Start Menu not working is a common Windows 10 error that has been troubling the users recently. It is essential to know how to fix it as it prevents us from using the beloved ‘Start menu.’ This is how you can do that. If you are still struggling, I’d recommend heading over to this official Microsoft thread related to this issue to seek further help.
That’s all for this post. I hope I helped you enough. Feel free to share your related experiences using the comment box.