Discord is a multifunctional platform for the gaming community where gamers can interact and have fun with each other. If you own a server, you need to know how to add bots to your Discord server. If you are trying to learn the same, this post is specifically written to help you.
Here, I will guide you on adding bots to your Discord server. It doesn’t matter if you have been operating your Discord server for months or years, or just created it today, the information present here is going to be invaluable for all Discord users.

What are Bots on Discord?
Basically, bots are computer programs designed to interact with humans and other bots and perform their specific functions in an automated manner. On Discord, bots follow the same definition. They can have a vast range of functions like playing music, sharing memes, to even completely controlling or managing your server.

Different bots are coded to serve different functions. If you use the right bots on your Discord server, you can reap a lot of benefits. However, not using the bots in the right way can also impact the server negatively.
Why should you use Bots on Discord?
The core reason to use bots on Discord is to moderate members and make the server more unique and fun than anyone else. Bots can serve a lot of functions on your Discord server. They can automate functions like accepting members, sending welcome messages to new members, and even assigning them roles.

The functions served by bots can be both productive and non-productive. For example, some bots can help you play the right music, view game stats, and even organize a Discord viewing party, while there are bots available whose mere function is to play weird sounds from time to time.
The key to getting the most out of bots on Discord is deploying the right ones. Also, there are literally no limits with bots on Discord.
How to Add Bots to a Discord Server?
Now that you know what are bots on Discord and what they do, it is time to learn about deploying them. Here is a quick 4-step guide that you need to follow for that. I have listed the 3 essential steps here along with some additional steps that totally depend on you to follow.

Step-1: Log in to your Discord Account
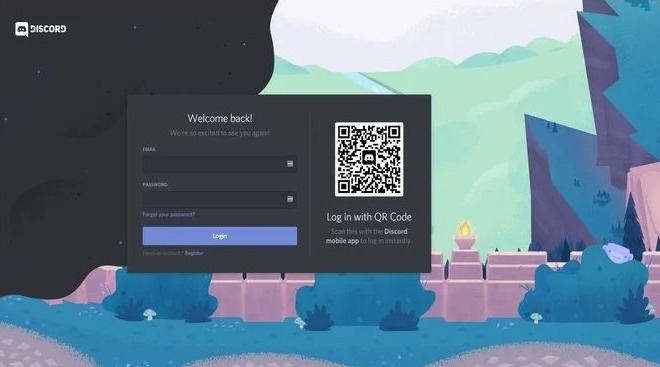
The first thing you have to do is log in to your Discord account. You have to log in to the Discord PC app as well as on the Discord website in a browser.
You can also log in to the website by scanning the QR code with the Discord mobile app.
Note: To add bots to a Discord server, you will need Administrator Access of that server. If you don’t have it, you will not be able to add bots.
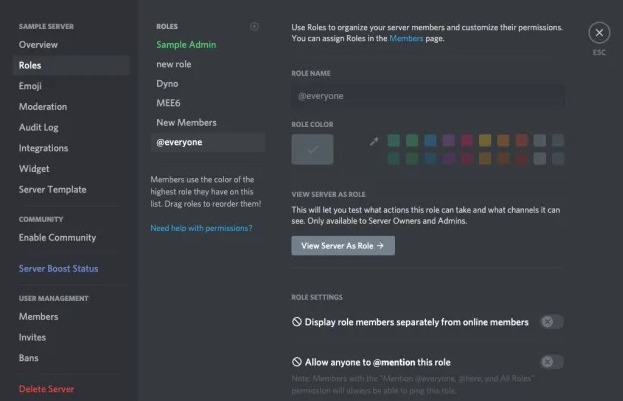
This is how you turn on Administrator Access on a Discord server:
- Choose the server from the Discord home page.
- Select the drop-down menu.
- Click on ‘Server Settings.’
- Click on ‘Roles.’
- Scroll down, and turn the toggle switch next to “Administrator” on (under General Permissions settings).

- Save the changes.
Now follow the next step.
Step-2: Invite the Bot you want to Add to Discord Server
Once you are logged in to Discord, you have to choose the bot that you want to add to your server. You can find bots on various third-party sources. A quick Google search can lead you to many such websites. I have also listed some of the best sources below.
Note: Make sure the bots you choose are currently only. This means that they can be invited to a server.
Once you have picked a bot, click on the ‘View’ button to find the general information page of this bot.

Next, click on the ‘Invite’ or ‘Add’ button. After that, click on the ‘Add to Discord’ button to proceed with your choice.

Step-3: Choose the Server where you want to Add Bot
In the next window, you will have to select the server where you have to add this bot. You will be shown a list of all the servers where the bot can be deployed.
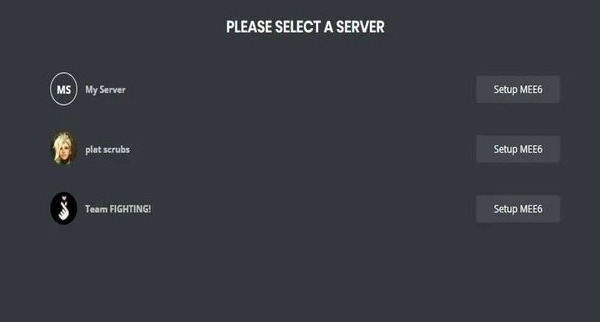
Choose the server from this list where you want to add the bot you picked.
Step-4: Authorize the Bot on your Server
Once you select the server, Discord will display the powers the bot will possess after being added to the server. Verify that you have selected the right server at this step, and go through the bot’s powers. You can also tick off and lower the bot’s powers, but that is not recommended as it will disturb its functions.

When you are ready, click on the ‘Authorize’ button present at the bottom right section. At this moment, your bot will be added to your server. It will be visible at the right sidebar among other members with a small ‘bot’ tag next to its name
Additional steps after you add bots to Discord
Here are some additional steps that you should follow after adding a bot to your Discord server:
Assign a Role to the Bot: After adding the bot, you can assign a role for it through the Server Settings menu. You can create a new role for the bot or assign an existing role. It is also possible to assign the same role to multiple bots.

Make a Command Channel for the Bot: You can also create a new text channel on the server for your bot. This will help to keep the server clean and clutter-free.

Test the Bot: It is always good to test your bot after setting it up and see if they are up to the function you have added them for.
Where to find the best bots for Discord?
Currently, Discord has bots developed by over 10,000 developers, and newer ones are added daily. So, it is pretty tough to find the right ones.

I have made things simpler for you by listing the sources to find the best bots for Discord.
These are some of the websites you can use to find the best bots for your Discord server. If you want suggestions on which bots you should use, we are working on a separate guide for that on our website.
Final Take
Bots can unlock a lot of functionalities and fun on your Discord server. They can make the server management hassle-less while also increasing the levels of entertainment. This is how you add a bot to your Discord server.
That’s all for this guide. If you still have any doubts or have any issues regarding the procedure, feel free to use the comment box. I’ll be glad to help further.