A distribution list plays an important role in any email service. And outlook offers this feature to categorize with a group of people whether it’s for personal, family, friends, or for business information. Usually, people have a bunch of contacts in their mailbox.
And they start sending us a promotional message about coupons and offers to all where the need is also not required. Sometimes we click and throw it into the spam folder but it’s an unnecessary task added to our daily routine. But if we kept this feature in mind then we never disturb someone even mistakenly.
But when someone Creates a Distribution list in Outlook the mail automatically goes to the particular contact group which you created in outlook. So it totally saves you from wasting time by sending mails to every person one by one, you apply this task for previous messages also.
If you join a group in outlook where people want to be addressed you personally but they don’t know about how to send personalized email to a group that’s why they copy messages every time and send them again and again to everyone. which consume your productive time a lot. For that Distribution list an ultimate solution for all the problems.
What is the Outlook Distribution list?
A distribution list is a group of contact we also called is Distribution Groups or even Contact Groups depending upon which outlook version are you using. Outlook comes up with one of the best and convenient features that allow messaging to multiple people at a time through a contact distribution list.
So it easily distributes a single message to an entire group of people which you categorize and thousand of your contact received a message via your one click. The outlook distributed list is created to make your job easy. You can save this list in your Contacts folder section and use it for sending an email to multiple people.
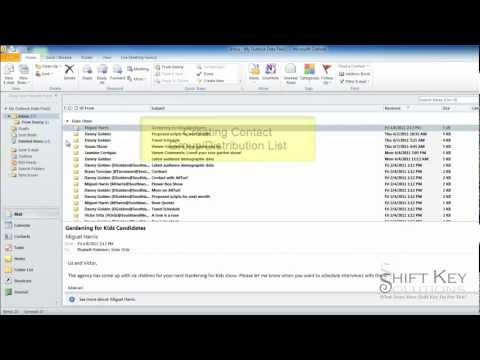
How to Create a Distribution list in Outlook 2010
Before going further this information will help to understand how outlook distribution works or there is any limit or not. While there are many versions of outlook that may be realized and before the version of outlook 2007 SP1, there is a limit to add a contact.
But after outlook 2007 SP1 there is no limit to adding contacts to a distribution list. So let’s jump towards creating a distribution list in outlook or adding contacts to the list. The process is very straightforward and it completes within a minute.
- First of all, open up the official outlook 2010 dashboard.
- Now head over to the menu ribbon and select the “Contacts” section in Outlook a new window popup just click on “New Contact Group” under the “Home” tab. This button is located in the “New” group.
- After that, you have to create a name for your new contact group in the “Name” field.
- Then Choose the “Contact Group” tab here in “Members” group you can see the option of “Add Members” button click on that then Choose one of these 3 options:
From Outlook Contacts
From Address Book
New E-Mail Contact
- If you choose from the “Contacts” or from the address book folder from the above option to your contact group, then the “Add Members” window will open.
- Open a contact option from the dialogue box and click the “Members ->” button. Use the search function, if you didn’t find particular contact. Repeat the process if you want to add more contacts to the same Outlook distribution list.
- If people are not in your address book, then use the “New E-mail Contact” option and enter the contact information properly in the “Add New Member” dialogue box.
Once you’ve complete the task of adding people to your contact group, then revise it once and click “OK” to save your entries. That’s it you are done a new distribution list appears under the name you selected in the “Contacts” folder.
How to Create a Distribution list in Outlook 2010 in Web Version
The web platform of outlook is easier than the application. But both have different advantages. With the web application of outlook, you can access the popular e-mail program in Office 365 that allows you to define distribution groups with a single e-mail address.
- First of all open any of your web browsers and make a login through Microsoft Office 365 account with your user credentials.
- Now choose the Outlook Web App.
- Then click the gear icon in the menu bar which is for setting then click the “Mail” option under “Your app settings“.
- From the left sidebar, Visit the “General” section and select “Distribution groups“.
- Under the “Distribution Groups, I Own” option select the plus symbol to create a new distribution list in Outlook.
- As you click your Outlook Web App opens the “New distribution group” window.
- Configure your distribution group: Enter a display name and nickname and specify the e-mail address from which you wanted to send messages to the contacts of the distribution list. Tick a checkbox “Make this group a security group” if you want to take it private or want to create a closed group. You can enter a short description or tag line for your distribution list it works as the “Notes” field.
- Now you see yourself as a group owner or admin. And when you send Messages it automatically sent to the address of a distribution group to all contacts of the group without sending individually to their address line.
How to Manage your Distribution list in Outlook?
So by the above method, you successfully created the outlook distribution list if all goes fine nothing about worry. But if you want to change something then you can manage the entire functionality such as achieve them, and remove someone, or personalized something then perform this operation via some clicks. So just edit your contact list as follows.
- For achieve option: Open Contacts option from the Navigation Pane, Find the name of the person whose details you want to edit then double-click over it. It takes you to the same window which you used to create the distribution list. Here you can correct all the changes you want in the contact list.
- For removing someone: If someone is misbehaving and you want to remove them from your distribution list, then simply select their name and then hit the Remove button.
- To add a new member: If you wanted to add someone new to the list, just select the Add New option. If he is In your address book select the Address Book option. But, if the member is totally new, then just select New Email Contact and add whoever as you want.
Conclusion
The outlook is old email platform which comes with a lot of feature and distribution listing is one of them. It not only save your time but also helps to connect with contacts who have a similar interest. According to the different categories,
we distribute the groups and there is no limitation of creating a list. Honestly, this is the best feature as compared to other mail services. If you’re new to outlook just tried this feature once and take benefits of it.
You May Also Read:-
Outlook 2010 Creating a Contact Group