Clicking pictures through the iPhone has become customary, but you can’t keep the pictures in it forever. You’d have to transfer photos from iPhone to your Windows PC from time to time in order to free up storage. However, a lot of users struggle to do that. If you are one of them, this post is written especially to help you.
Here, I will tell you the 5 best methods to transfer photos from iPhone to a Windows PC easily. You can use any of the methods and save up your invaluable clicks on your computer.
5 Best Methods to Transfer Photos from iPhone to Windows PC
iPhones come with exceptional cameras but the pictures can’t be stored in the device permanently. You must transfer or back them up either on another storage or cloud. Since the cloud isn’t trusted much by a lot of individuals, they tend to store their pictures on their Windows PC. New iPhone users often struggle to transfer pictures to their computers.

Fortunately, there are multiple easy methods available to do that. I will explain the 5 best ones here. You can pick any of the methods that you find easy and suitable, and use it to transfer important pictures from your iDevice to your Windows computer. These methods will consist of both wired and wireless transfers.
1. Use File Explorer to Transfer Photos from iPhone to Windows PC
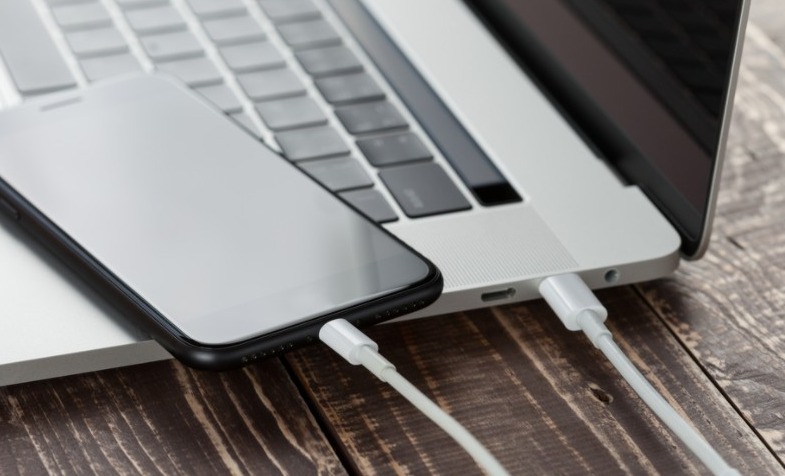
The first and the simplest method to move pictures from an iPhone to a Windows PC is through File Explorer. You will need a suitable Lightning to USB cable in order to connect your iPhone to PC. Once you have the essentials, follow these steps:
Step-1: Connect your iPhone to your Windows PC using the USB cable. Make sure it is properly plugged in at both ends.
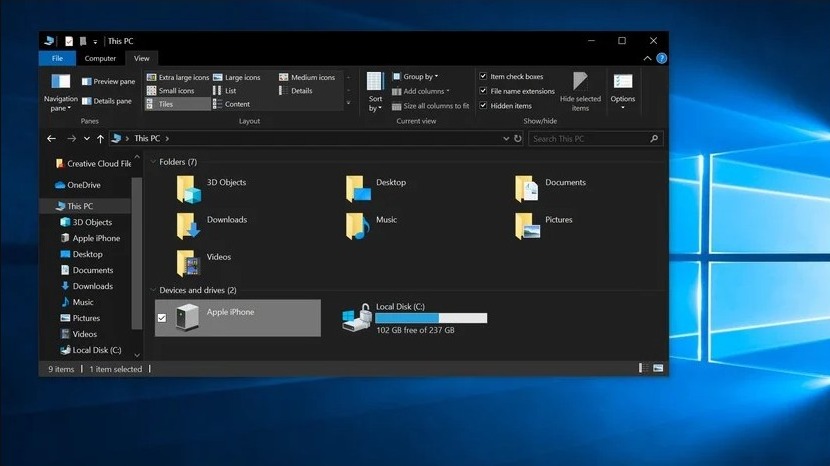
Step-2: Once connected, press the Windows + E key to access Windows Explorer. You can also run it with other means such as the desktop or Start menu.
Step-3: Now click on the arrow (>) present next to ‘This PC’ on the left side.
Step-4: Next, click on the iPhone (Your iPhone) from the sub-menu.
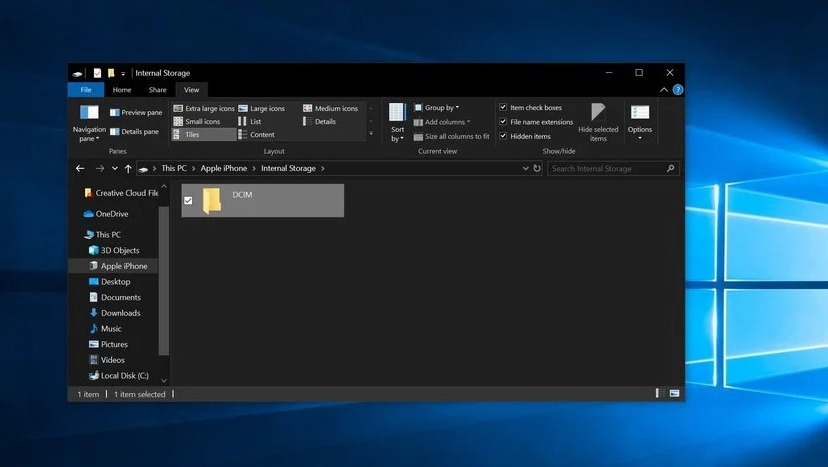
Step-5: Next, double-click on Internal Storage, and then double-click on the DCIM folder.
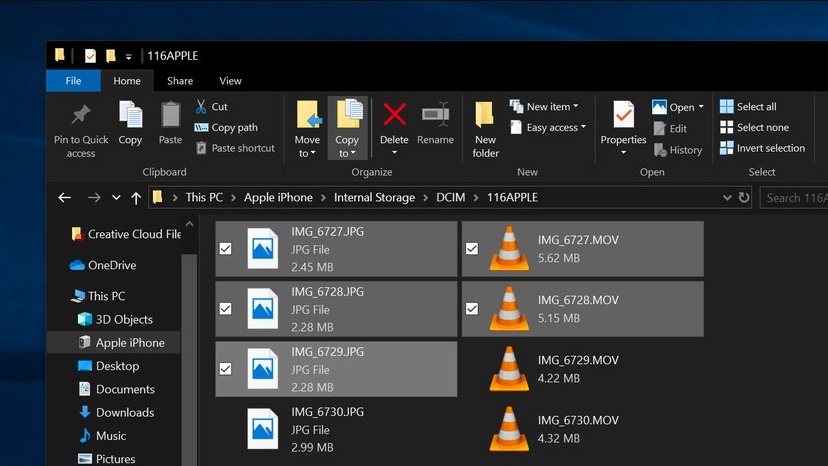
Step-6: Then double-click on any folder from which you want to transfer the pictures.
Step-7: Choose all the pictures that you want to transfer and then click on Copy to or Move to from above, then choose a destination where you want to keep these pictures, and finally click on Copy or Move.
That’s it. Wait patiently if you have selected a lot of pictures as it will take some time. You can see the progress on-screen.
2. Use iCloud to Sync Photos Between iPhone & Windows 10
If you want to transfer the pictures between an iPhone and Windows PC, then you can use iCloud for that. You will have to back up photos to iCloud on your iPhone for that. Once ready, follow these steps:
Step-1: Go to the Microsoft Store from the Start menu on your PC. Find iCloud on the store and click on Get to download it on your PC. Once installed, click on Launch to run it.

Note: If you are using a Windows version older than Windows 10, then you can get iCloud from Apple to proceed with the steps below.
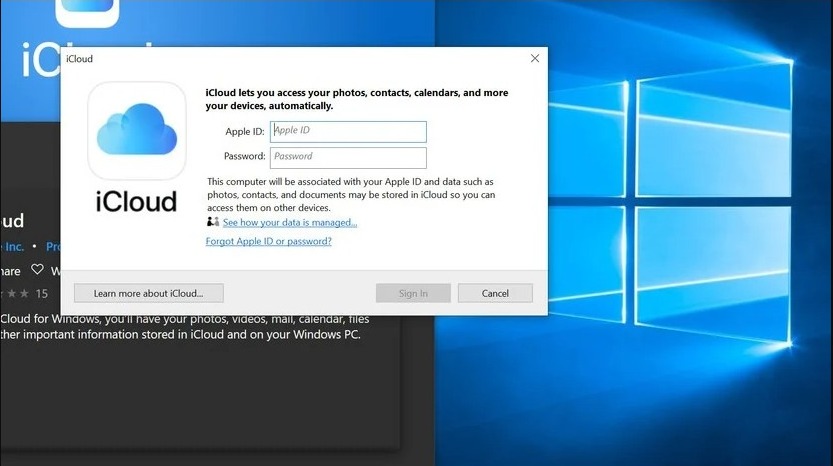
Step-2: In the iCloud, enter your Apple ID and password, and then click on Sign in.
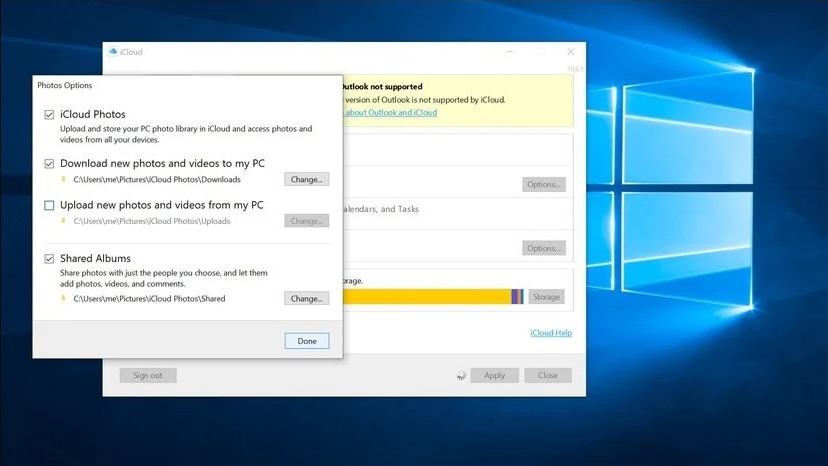
Step-3: Now click on ‘Options’ present next to Photos.
Step-4: Next, check the box present next to ‘iCloud Photos’ and uncheck the box present next to ‘Upload new photos from my PC.’ Then, click on Done, and then click on Apply.
That’s it. Now any picture available in your iCloud will be downloaded to your Windows 10 computer.
3. Use the Windows 10 Photos App to Share Pictures
Another method to transfer pictures from an iPhone using a USB cable to your PC is to use the Windows 10 Photos app. To know what you have to do, follow these steps:
Step-1: Connect your iPhone to your Windows computer using the USB cable.
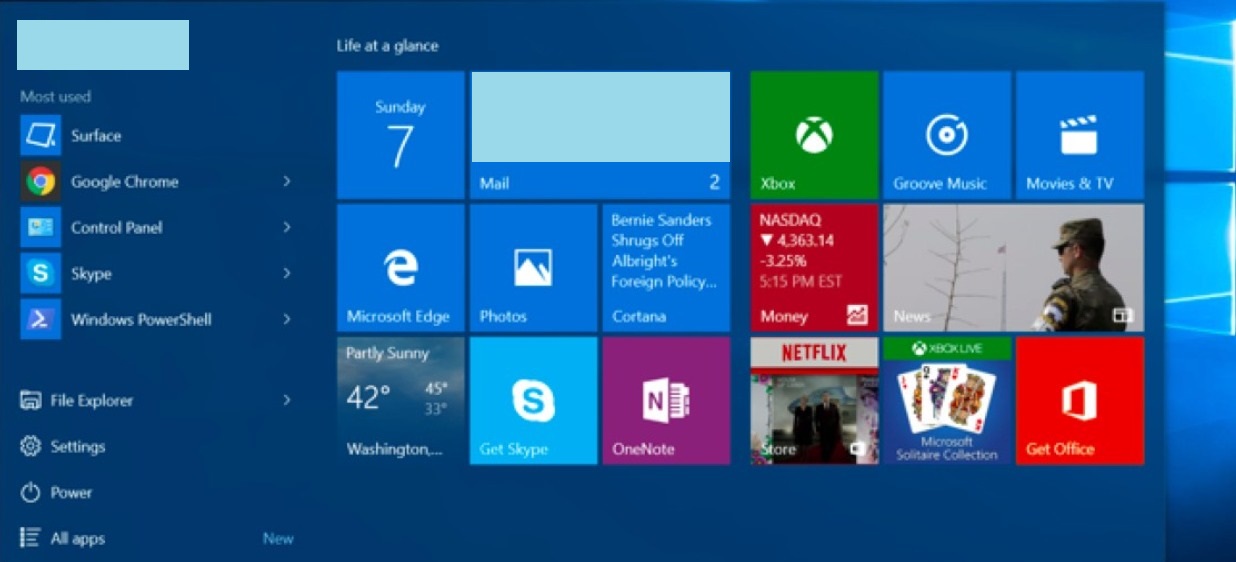
Step-2: Once connected, run the Photos app from the Start menu or desktop.
Step-3: In the Photos app, click on Import present on the top-right corner of the screen. Next, choose ‘From a USB device.‘

Step-4: Now click on any photos that you don’t want to import. The new pictures will be imported by default. Then, click on ‘Continue’ and the Photos app will import the pictures to your PC from your iDevice within a few minutes or seconds.
That’s it. The time taken to import the pictures from iPhone to PC depends on how many pictures you are importing, and how good is the USB cable.
4. Use WhatsApp Web to Transfer Pictures
If you only want to transfer a few or some pictures from your iPhone to a Windows computer, then you can use WhatsApp Web for that. To know what you have to do, follow these steps:
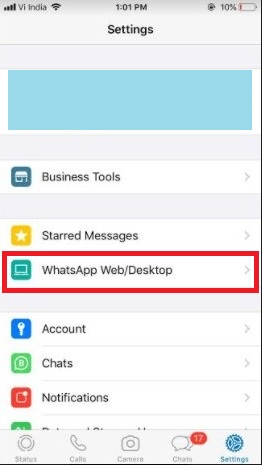
Step-1: Open WhatsApp on your iPhone, tap on the ‘Settings’ icon present on the bottom-right corner of the screen. Now tap on WhatsApp Web/Desktop from the settings.
Step-2: Open a browser on your Windows PC and visit web.WhatsApp.com. Now scan the QR code present on the screen with the scanner on your iPhone.

Step-3: Once your WhatsApp account is logged in on WhatsApp web, send the pictures you want to transfer to someone on WhatsApp on your iPhone. After that, open the chat in which you have sent the pictures on WhatsApp web.
Step-4: If you have received the pictures on WhatsApp, then you can directly open the chat in WhatsApp web. Find the picture you want to transfer, click on the ‘Down arrow’ present on it, and then click on the ‘download’ option. The picture will be downloaded to your PC.
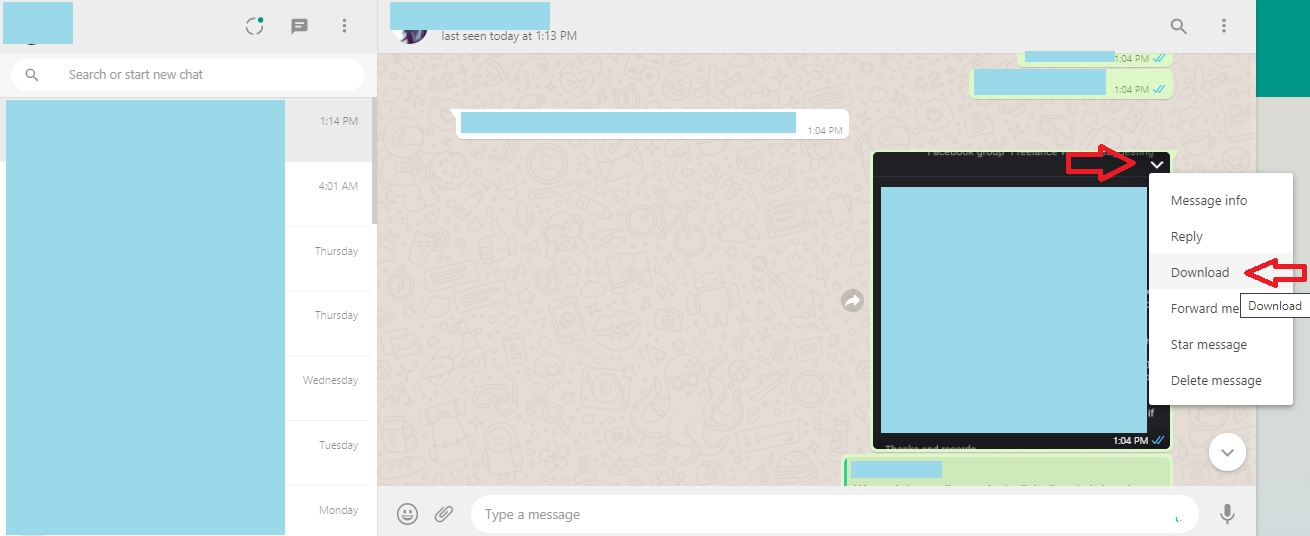
That’s it. Do this with all the pictures that you want to save to your computer. This is a simple but time-consuming method if you want to send a lot of pictures.
5. Use Gmail to Mail the Pictures to Yourself
Another simple method to move a few pictures between an iPhone and a Windows computer is to email the pictures to yourself via iPhone and then accessing them on PC. This method will help you to transfer pictures without losing their original quality. Follow these steps to know everything briefly:
Step-1: Open the Gmail app on your iPhone. Compose a new email and enter your own email address in the ‘To’ column. Attach the pictures you want to transfer, and then send the mail.

Step-2: Open a browser on your computer, and open your Gmail inbox. Open the email you have received from yourself, and download the pictures present in it.

That’s it. This is a very simple but useful method to transfer pictures from an iPhone to your computer.
Final Take
iPhone is only good to click pictures but not store them. You’d have to eventually move the pictures to your Windows 10. These are the 5 best methods to do that. You can make a habit of transferring pictures from time to time, or you can transfer them all at once when you feel that you are running out of storage on your iPhone. The former will be an easier way and the latter will consume a lot of time.
Along with storing them on your PC, you should also make a backup on a cloud such as iCloud or Google Drive. That’s all for this post. I hope you find it helpful. Feel free to use the comment box to ask any questions or give suggestions.
