Facebook Groups are fun and very useful at times. But, as time passes, some of your groups may become obsolete. So, it would be a wise decision to delete a group on Facebook that you no longer want to keep active. However, the procedure to delete that isn’t straightforward like deleting a page.
That’s why I’ll explain everything briefly in this post. Here, I will guide you on how to delete a Group on Facebook in simple steps. Additionally, I’ll also tell you other actions that you can consider instead of deletion, such as Archiving it.
Guide: Delete a Group on Facebook Easily
People create groups on Facebook with a specific plan. However, it is usual for any group to not work according to the plan. In this situation, you’d feel the need to delete it. But, Facebook doesn’t provide a direct ‘delete’ button to get rid of any group. There is a procedure that you have to follow.
Before moving on with the procedure, I’d like to recommend that you think about your decision twice. When you delete a group on Facebook, all the data and members will be gone. You cannot recover it back again. So, think wisely and make up your mind before moving on. You can also consider the other options listed below if you are not sure of deleting the group.
Delete a Group on Facebook using PC
Deleting a group is a pretty long procedure since you have to manually delete all the members of the group before deleting it. It is recommended to do that on your PC by using a web browser. Follow these steps in order to know what you have to do:
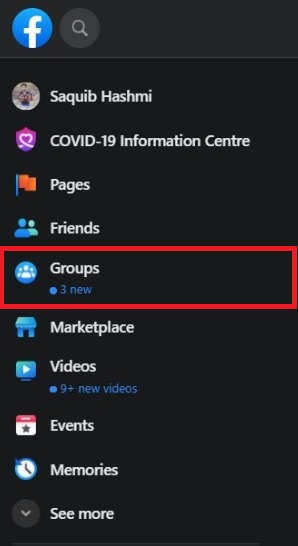
Step-1: Open a browser on your PC. Visit Facebook and log in to your account. Now, click on Groups from the left pane.
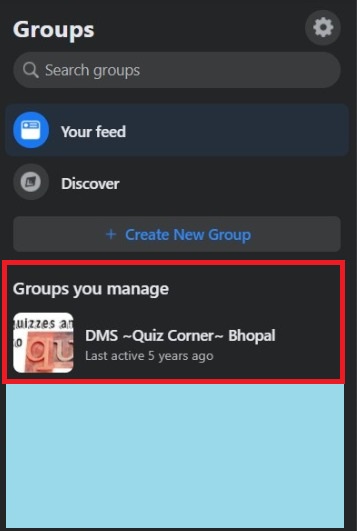
Step-2: Once in the Groups section, click on the name of the group you want to delete under the ‘Groups you manage’ section.
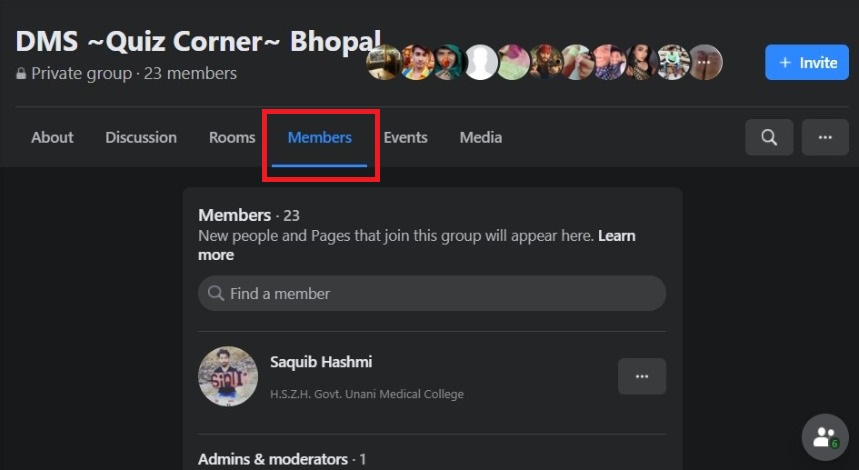
Step-3: Now, switch to the ‘Members’ tab present under the title of the group. You will then see the list of members of the group. Click on ‘See all’ to expand the list.
Step-4: Next, click on the ‘3-dots’ present next to each member’s name and then click on ‘Remove member.’ You also have to click on ‘Remove’ when Facebook confirms your choice. Do the same with all the members of the group to remove every one. This is a time-consuming task.

Step-5: Once you have removed everyone else from the group, click on the ‘3-dots’ present next to the ‘search icon,’ and then click on ‘Leave group.’
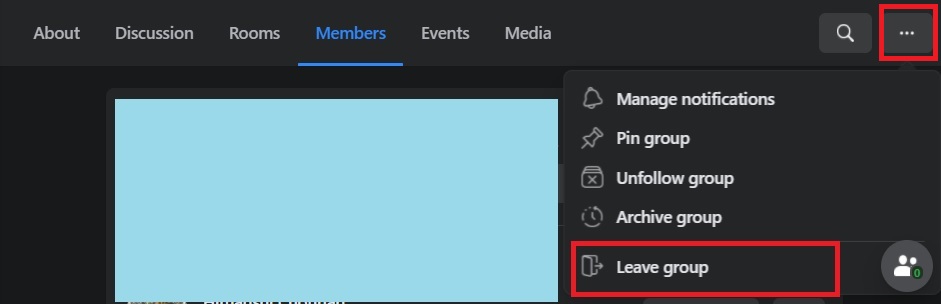
Step-6: Facebook will remind you that since you are the last member, leaving the group will automatically delete it, here click on ‘Leave Group’ to confirm your choice.

That’s it. The group will be deleted in the next couple of seconds. After that, you can never get it back. This is how you delete a group on Facebook using a PC.
Delete a Group on Facebook using Mobile
You can also delete a group on Facebook by using the mobile app. If you want to know how to do that, follow these simple steps:
Step-1: Launch the Facebook or Facebook Lite app on your smartphone. Log in to your account, and then tap on the ‘3-horizontal lines’ present on the top right corner.

Step-2: Now tap on ‘Groups’ to access your groups on Facebook.

Step-3: Next, tap on See more, and then tap on ‘See All’ to see the groups you manage.

Step-4: Next, tap on the name of the group you want to delete under the ‘Groups you manage‘ section.

Step-5: Now tap on the ‘down arrow’ present next to the group title and then tap on ‘Group info.’

Step-6: Next, tap on Members to see the members of the group. Tap on ‘See All’ to view the full list of members.

Step-7: From the list of members, tap on the name of the member you want to remove.

Then, tap on ‘Remove [name of the member’ from Group.’

When prompted, tap on ‘Confirm’ to confirm your choice.

In this way, remove each and every member of the group. It may take some time but the process is essential to delete the group.
Step-8: Once you have removed every member of the group, go back to ‘Group info’ and then tap on ‘Leave Group.’ When Facebook prompts that leaving group will lead to deletion, tap on ‘Leave’ to confirm your choice.

That’s it. This is how you delete a group on Facebook by using the mobile app.
Other Options to Consider for your Group
It isn’t essential to delete a group every time. There are other options available, you can use them to prevent deletion. If you are not sure that if you should delete a group, then you must go through the options listed below. These options will save you from the regret of losing your precious group forever.
1. Archive the Group
Archiving a group means hiding it. It is the right option when you don’t want to keep the group active temporarily or when you don’t want others to use the group. To ‘archive a group on Facebook,’ visit the Groups section, go to the group you want to archive, click on the 3-dots present on the right side, and then click on the ‘Archive group’ option.

When Facebook prompts you to confirm your choice, click on ‘Confirm’ to apply the changes.

Once the group is archived, no one will be able to see it. Only you can view it. You can unarchive it any time to make it visible to everyone.
2. Assign New Admins
If your sole reason to delete a group is that you are busy and couldn’t keep up with the group, then you can assign new admins to manage your group instead of deleting it. This will help you to maintain the reach and activity of the group. To assign new admins, go to the group, switch to the ‘Members’ tab, scroll down, and then click on ‘Invite Admins.’

Then, invite all the members you’d like to appoint as admin. Once they approve your invitation, they’ll receive the admin privileges. You can then instruct them about the management via Messenger.
Final Verdict
When you think the time of a group is up, this is how you can delete it. This was the simplest guide to delete a group on Facebook. You should only delete a group when you are completely sure about it. If you are not, you should consider other options like archiving it or assigning new admins for the management. I have explained everything above.
That’s all for this post. I hope you find it helpful. Feel free to use the comment box for any further help or suggestions.